1. P2P
A peer-to-peer (P2P) network is a type of decentralized and distributed network architecture in which individual nodes in the network (called "peers") act as both suppliers and consumers of resources, in contrast to centralized client–server model where client nodes request access to resources provided by central servers. Networks in which all computers have equal status are called peer-to-peer or P2P networks.
In a peer-to-peer network, tasks (such as searching for files or streaming audio/video) are shared amongst multiple interconnected peers which each make a portion of their resources (such as processing power, disk storage or network bandwidth) directly available to other network participants, with no need for centralized coordination by servers.

With the P2P enabled on NVR, you can add the NVR and view the live video over WLAN remotely without doing any port forwarding on the router.
2. How to Use P2P on M-Sight Pro
2.1 Enable P2P on NVR
You can use P2P function directly after enabling it on the NVR’s web or monitor.
Way 1: Enable on the monitor
Right click on the live view and choose “Menu”->“System”->“Network”->“Milesight Cloud”, you will see the image as below; Then choose “Enable” on “Milesight Cloud”; Next, choose the region where you from on “Region”;Click the “Apply” to save all the settings.
You can see the Milesight Cloud state turns to “Online”, then you can use it freely on “M-Sight Pro”.

If failed to apply this setting, please check these tips:

Way 2: Enable on the web
Enter the web page of NVR ->“Settings”->“System”->“Network”->“Milesight Cloud”. Details are the same as on the monitor.

If failed to save, please check these tips:

Note:
A. Please make sure that NVR is available for internet before enabling.
B. Please make sure your NVR version is V7X.9.0.12 or above, and the APP version is V3.1.0.5 or above.
C. If you still can not enable P2P or activate P2P successfully, please contact Milesight Support Team: support@milesight.com
2.2 Settings on M-Sight Pro
Step 1: Open the M-Sight Pro, and click on these icons to add device:

Step 2: Choose “P2P” as “Type”:
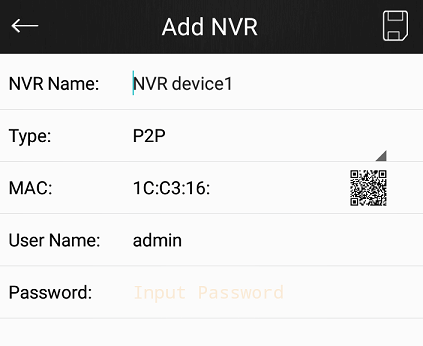
Step 3: Add MAC
There are two ways to add MAC:

Way 1: Input manually after tapping area ①;
Way 2: Automatically input by scanning bar code/ QR code after tapping icon ②;
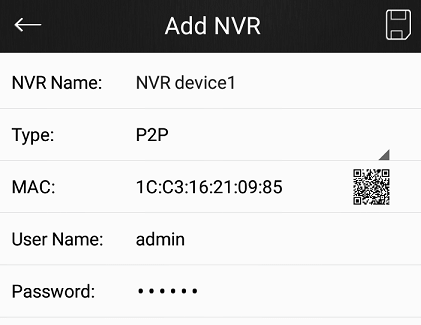
Step 4: Input the NVR name, the user name and the password to finish adding device.
2.3 Device management
After adding the NVR via P2P, you can manage it by tapping ”Device Manager”,and then tap the icon ①;

This interface will come up:

1.If you want to Edit the NVR, tap the “Edit” and you can edit NVR’s info here:

2.If you want to view the live video of your network cameras in the NVR, tap the “Play”;You can check the Live View here:

3.If you want to delete the NVR, tap the "Delete".This NVR will be deleted in Device Manager.
-END-